Attack from Mars
Mini-Saucer LED KitTM
About the AFM Mini-Saucer LED Kit
(Click on pictures to enlarge)
|
In January of 2004, I finally got my hands on an Attack from Mars pinball machine. This was my first new (to me) pinball machine in several years, primarily due to a lack of space. Having recently moved, I now had more space to play with. With the help of a friend, I purchased my Attack from Mars from a local arcade chain. They had already shopped out the game for me ... but we all know what that means!! As I worked on a more thorough cleaning of the game, I had the opportunity to look at many pieces up-close. Some of the dirtiest pieces were the large flying saucer (a.k.a. "The Mother Ship") located in the middle of the playfield, as well as the six smaller flying saucers that decorated the rest of the playfield. It took a while to properly clean up these items, I had to scrub nearly a decade of grime off of them. The novus did its job well, but it kept getting stuck in the grooves of the design, as well as the little holes in the saucer plastics. As I looked closer at the mini-saucers, it occurred to me that a small LED might fit into those holes. Since I had a few old LEDs laying around, I tried one and sure enough, it was a perfect fit!! 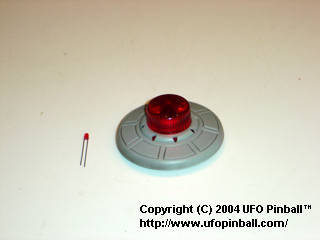
Saucer plastic with a miniature LED 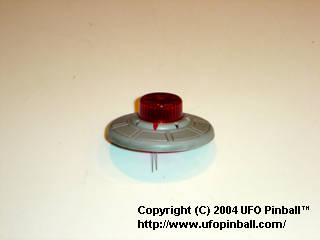
Yup, it fits!! Okay, so this was a pretty interesting discovery ... light-up saucers were definitely in my future. However, I really wanted to do more than just add some lights. I wanted them to compliment the Mother Ship by displaying different animated light patterns. That was going to be a little tougher ... however, despite being a Software Engineer by trade, I did have some training in digital electronics as well as some general electrical technical knowledge. Was I up to the task? We would soon see... I began building the prototype in my head, and in doing so, I lost a good amount of sleep. Still, I knew what I wanted to accomplish, and within the week I had placed an order for a breadboard and the various electronic parts that I would need. At this point, I hadn't really drawn a schematic because ... well, I'm lazy. Plus, I had a pretty good idea on where I was going with this, and am not known for being particularly patient. Once the parts had arrived, I began to assemble it. This took quite some doing, because I not only had to build the initial prototype, but I also had to design a prototype a ROM image to display the various initial test patterns ... and I hadn't written the software tool to help me out with that yet!! Slowly but surely, I built the prototype in stages ... the first cut could only drive one saucer (initial validation of the concept) ... then two, then four ... and finally, all six. In addition to the animated lights, I had also dreamed up a feature that would link the board to the action of the game. Anytime the Mother Ship took a hit, I wanted the rest of the saucers to respond as the "damage" propagated throughout the Martian Fleet. This feature involves a separate circuit that took several iterations until I had it working the way I wanted. Here are some images of the initial prototype: 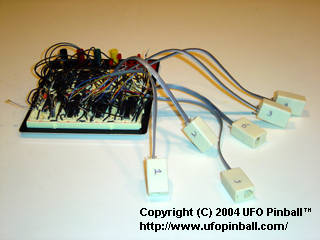
The finished prototype breadboard 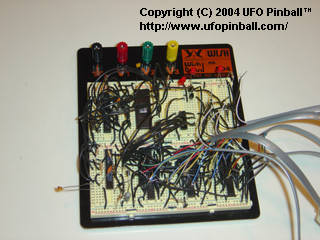
A closer view of the prototype breadboard 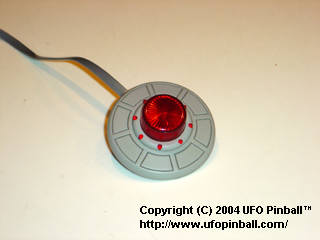
A mini-saucer, fitted with red LEDs Now, I had a working prototype. It worked well, but a breadboard really isn't meant to be used in a permanent fashion. Connections would flake out on me on a regular basis, which was frustrating, and time consuming. Ultimately, I knew I'd have to get an actual board made, so I began putting that together. Using the tools provided by the PCB vendor, I finally drew up the basic schematic, and then began working on the PCB layout. Man, I gotta tell ya ... designing a PCB isn't the easiest work in the world, but I would have to say it was still kinda fun. I did my best to build the board as close to industry specifications as possible. I might have gotten in done sooner, but I couldn't help continually tweaking the traces, adding features, and polishing the product. When I was finally satisfied, I sent it in and crossed my fingers. I had double and triple-checked my connections, but after so many late-night working sessions, I really doubted just how reliable my eyes were. Within a week or so, the finished prototype PCB arrived. It was just a bare board, but I have to admit it was kinda beautiful to look at ... I could barely wait to assemble it. Putting the board together actually went fairly quickly. When I was done, I plugged it in, held my breath, and turned it on. I have to admit to being a little shocked when the darn thing actually worked!! 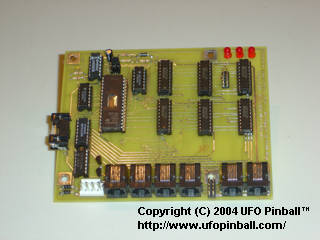
The finished prototype printed circuit board 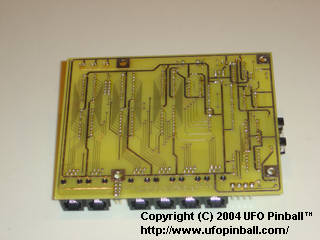
The back side of the prototype printed circuit board Yeah, okay ... so if you want to get technical, the board wasn't perfect. The PCB software did not have a ready-made template for a 5x20mm fuse holder, so I had to make my own. I didn't note that the default pin-hole size was too small to properly mount the fuse holder. If you look closely at the top picture above, you can see how the fuse holder is mounted in an odd-ball fashion. Oh well, you can't win 'em all ... at least I had a chance to fix it prior to going into production. 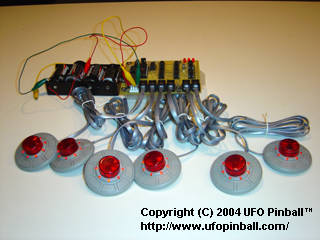
The completed product, ready to install (Batteries not included) The last thing to do was to install it in the game, and give it a true run. Once installed, I powered it up ... the lights started dancing, and I stood back and marveled at my creation. Even taking into account at how easily I am amused by sets of flashing lights (aren't we all?), I still thought I had put together a pretty nifty toy. The next hurdle was to create and program different patterns to be displayed on the ships. This actually took a considerable amount of doing. A few sample patterns are available on the Features page, with hopefully some longer video footage coming soon. 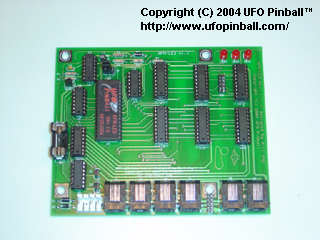
The production printed circuit board 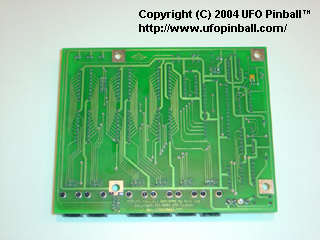
The back side of the production printed circuit board If at this point you are wondering how to get your hands on something like this, then the answer to your question is yes, I am building kits that are available for Purchase. |
Back to the Main Page
Copyright © 2004 UFO PinballTM
www.ufopinball.com