Attack from Mars
Mini-Saucer LED KitTM
How to Install the AFM Mini-Saucer LED Kit
Chapter 5: Connecting the saucers to the board
(Click on pictures to enlarge)
|
Now that you have all six saucers mounted, you can feed the wires under the playfield. This may require removal of the Lobster ramp, as the wires for Saucer #1 feed through a hole directly below this ramp. The wires for Saucers #2 and #3 feed through a hole located at the far back of the playfield, which is also easier to access once you have moved the Lobster ramp aside. 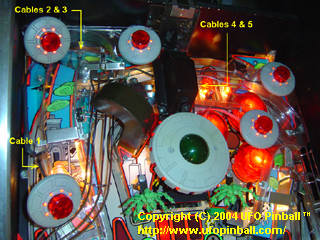
Location of cables for Saucers 1-5 The wires for Saucers #4 and #5 feed through a hole located below the arm that's holding the Mother Ship, just underneath the "Lock" ramp entrance. If your ramp is nice and clean, you should be able to see the hole that you are after, and can feed these wires through without having to remove anything on the game. 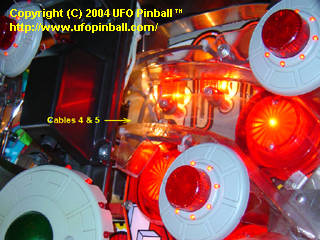
Location of cables for Saucers 4 & 5 The wires for Saucer #6 feed through an easily accessible hole, located just to the right of the saucer. 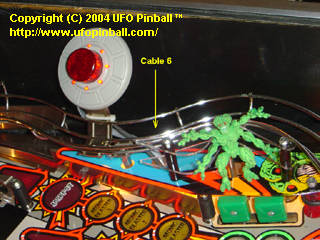
Location of cable for Saucer 6 Now that you have completed feeding the wires under the playfield, pull the playfield out and gather the wires together. Run the wires towards the back of the game, and up through the hole leading to the backbox. Route the wires themselves between the CPU board and the Power Driver Board ... go under the ribbon cables. Plug each saucer wire into the corresponding plug. The plugs are numbered 1-6 with plug #1 closer to the bottom of the board, and plug #6 at the top of the board. 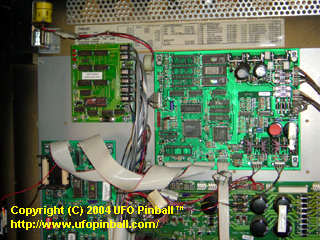
AFM-LED Kit installed in the backbox 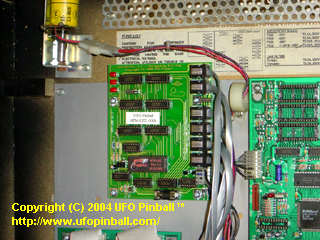
Close-up of the AFM-LED Kit installed in the backbox 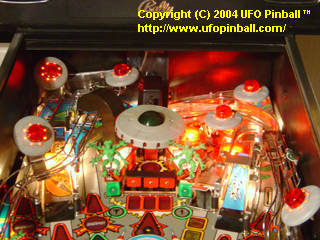
Playfield view of the AFM-LED Kit, fully installed Once you have connected all the saucers, turn on the power and enjoy your new Attack from Mars Mini-Saucer LED Kit!! You will probably want to take a moment to double-check the orientation of your saucers, and adjust them if the patterns appear to be off. The initial animation sequence should be largely synchronous between the six saucers. You can see a sample of the sequence as the first animation on the Features page. After you have verified proper operation, use the supplied zip ties to keep the saucer cords and other wires above the playfield nice and neat, and out of the path of the ball. Chapter 1: Installing the board Chapter 2: Connecting the wire harness Chapter 3: Inserting the LEDs in the saucers Chapter 4: Remounting the saucers back in the game Chapter 5: Connecting the saucers to the board |
Back to the Main Page
Copyright © 2004-2005 UFO PinballTM
www.ufopinball.com