Attack from Mars (Remake)
Mini-Saucer and Expansion KitTM
Chapter 4: Installing the mini-saucers back in the game
(Click on pictures to enlarge)
|
This chapter will show you how to mount the saucers, and what to do with the wires. This mirrors the installation from the original kit. Note that this is just the mounting of the saucers themselves, we'll route the wires under the playfield when we are done (in the final chapter). Please note that Saucer #6 has a longer cable than the rest of the saucers. Be sure to mount this one properly, or you will have trouble when you try to pull out and/or raise the playfield to work on your game!!! Before you begin mounting the saucers, please apply some black electrical tape (supplied) to the metal bracket where the saucers mount. This is to help prevent the saucer LEDs from shorting out on the metal brackets. To run the wires for saucers 1, 2 and 3, it is often easier to loosen the Lobster ramp before beginning. To do that you will need to remove three main screws, so that you can lift the ramp towards the back of the game.
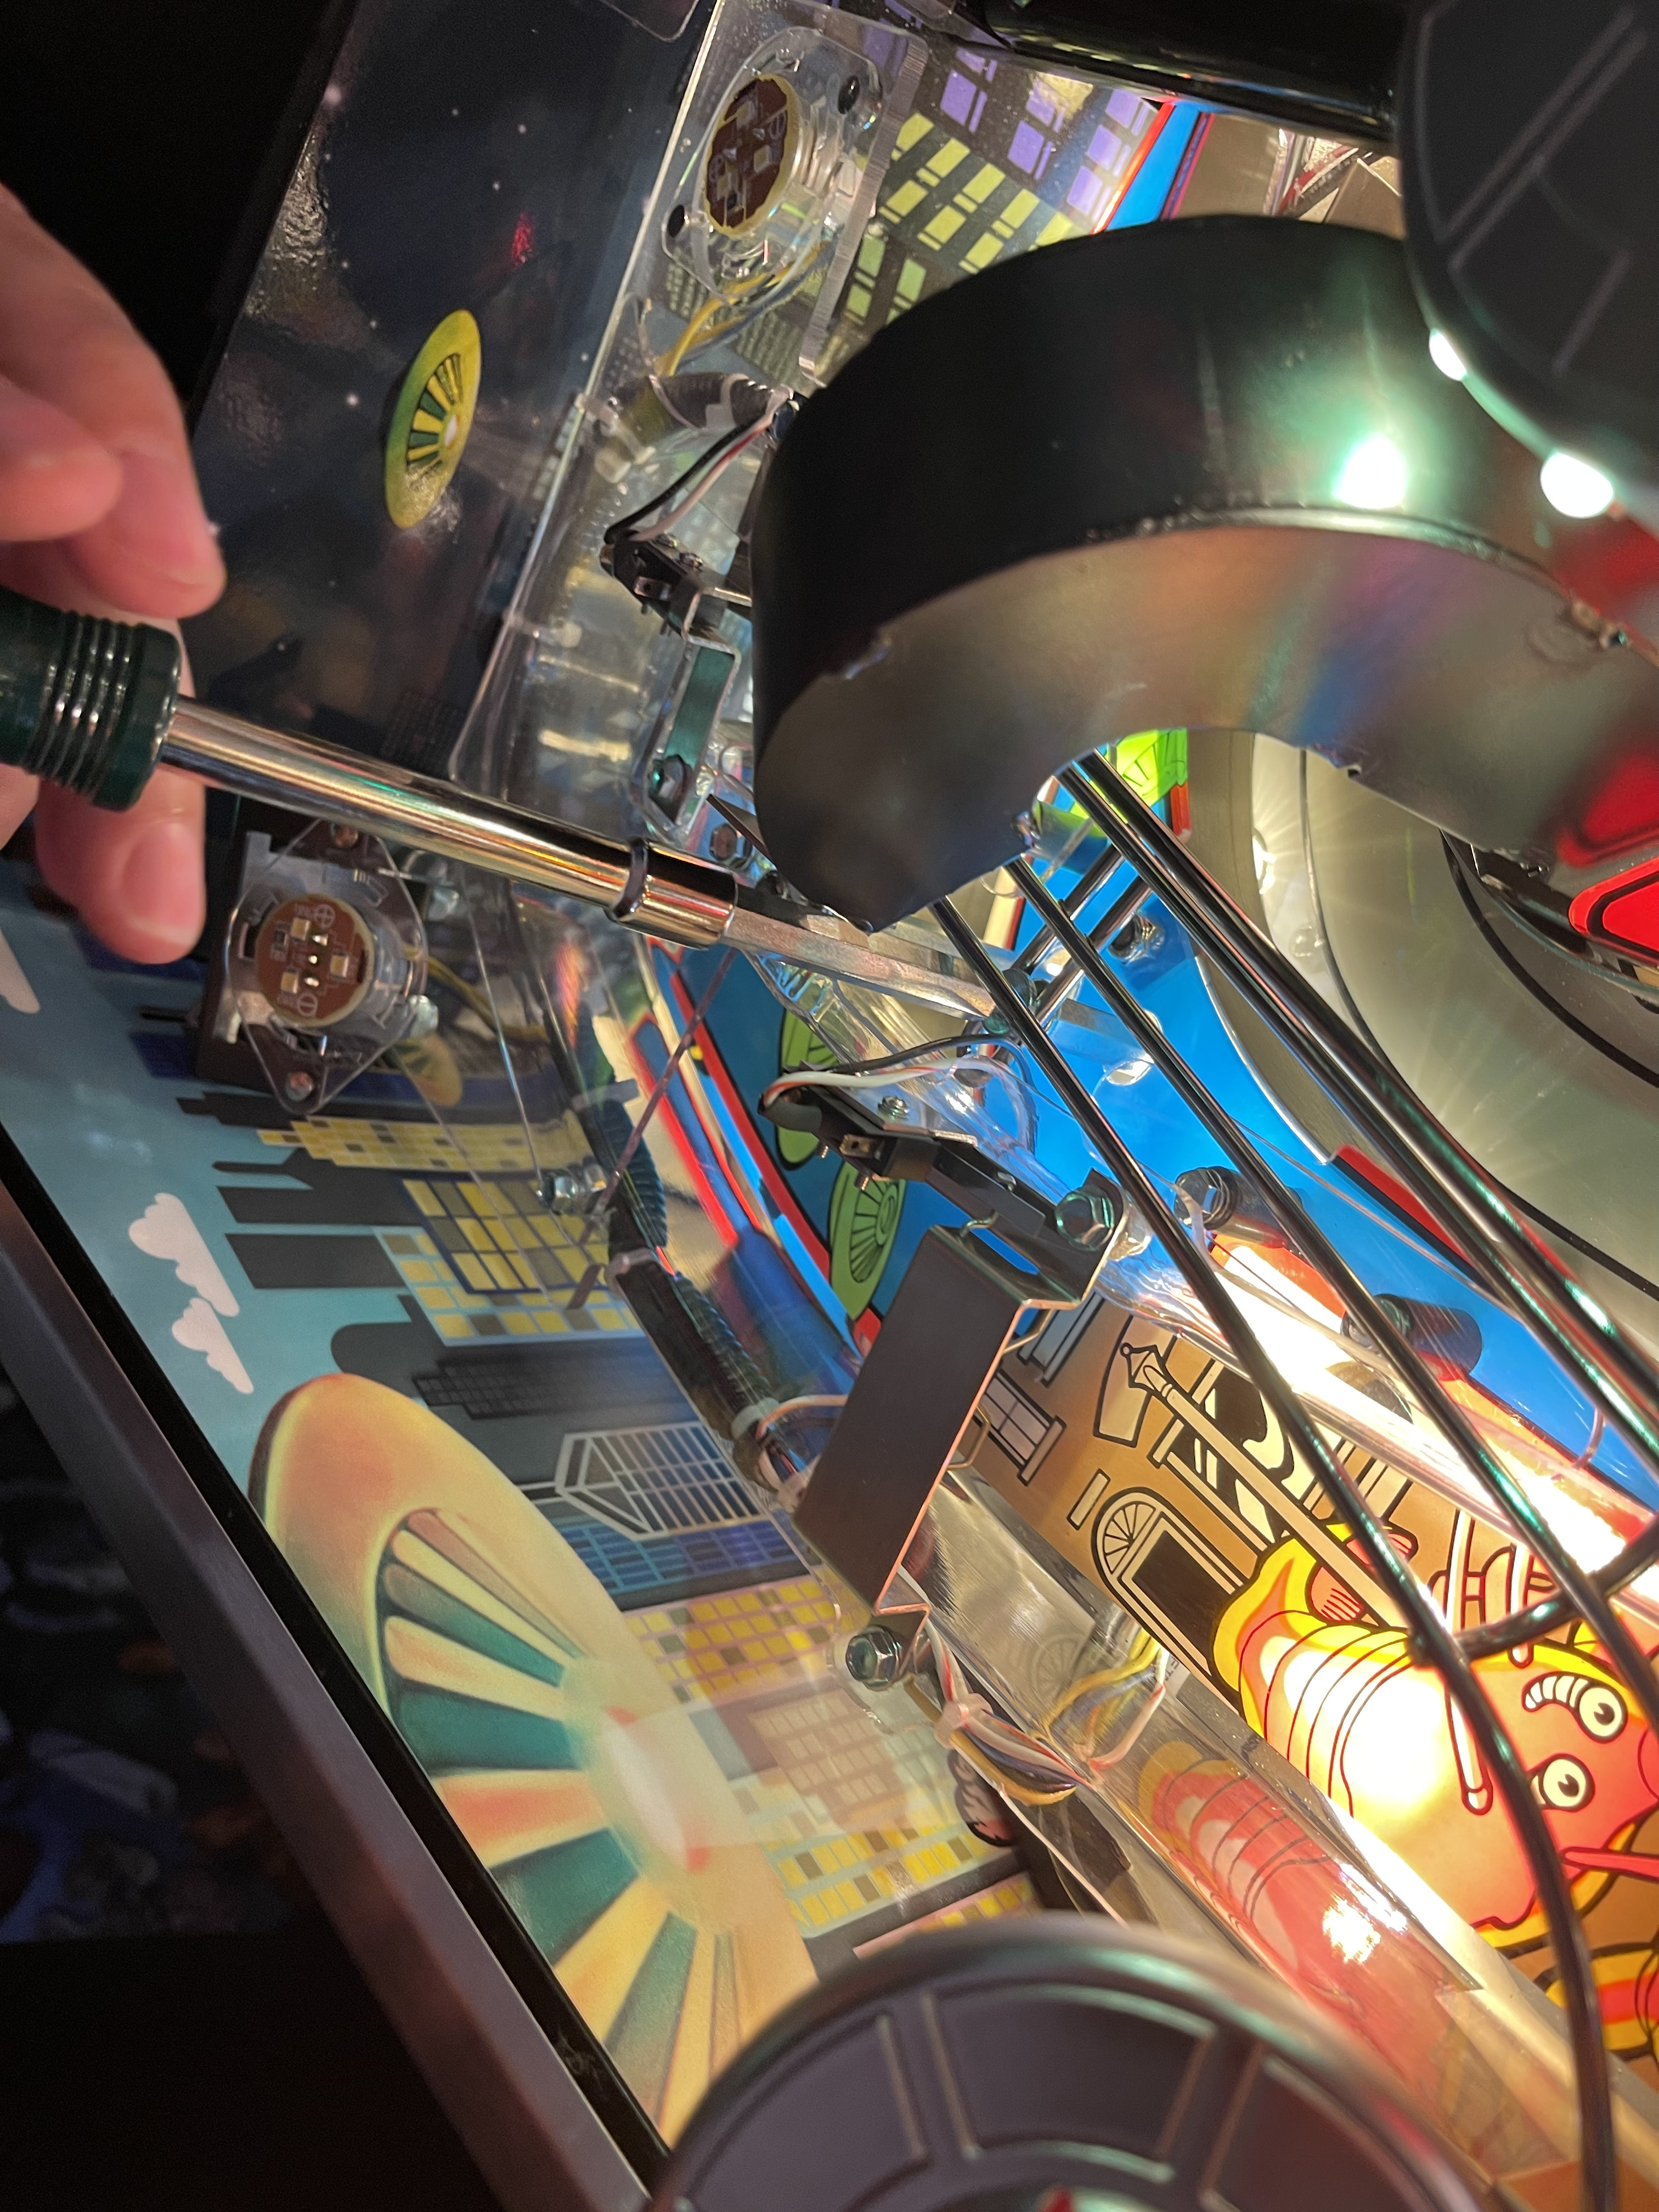
Also, running the wires for saucers 4 and 5 under the Mothership is usually easier by removing the Mothership first. You may want to check out that procedure in Chapter 5: Setting up the Hallway LEDs Saucer #1 is located to the left of the entrance of the Lobster ramp. Install it so that the wire for the LEDs is located towards the playfield ... somewhere between the 6 and 7 o'clock position. 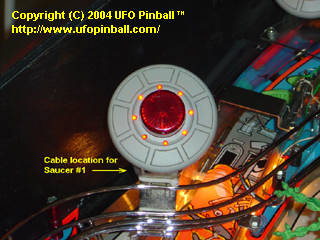
Location of cable for Saucer #1 Saucer #2 is located in the far back left corner of the playfield. Install it so that the wire for the LEDs is located towards the left wall of the game ... at approximately the 9 or 10 o'clock position. 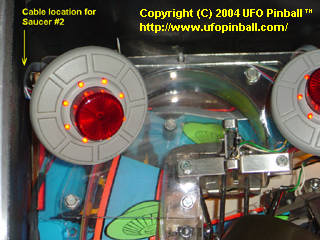
Location of cable for Saucer #2 Saucer #3 is located to the right of Saucer #2, near the Mother Ship. Install it so that the wire for the LEDs is located towards the back wall of the game ... at approximately the 11 or 12 o'clock position. 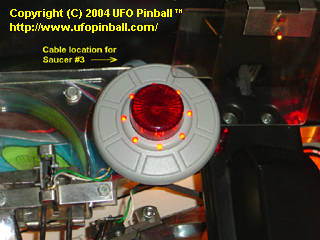
Location of cable for Saucer #3 Saucer #4 is located to the left of the Cow ramp, near the Mother Ship. Install it so that the wire for the LEDs is oriented along the wall of the ramp (towards the left) ... at approximately the 10 or 11 o'clock position. 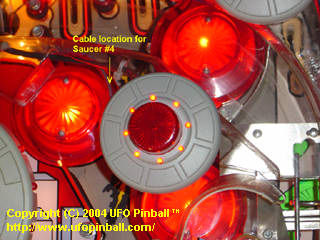
Location of cable for Saucer #4 Saucer #5 is located towards the back right corner of the playfield. Install it so that the wire for the LEDs is oriented along the wall of the ramp (towards the left) ... at approximately the 10 o'clock position. You should feed the wire behind the pole just to the left. 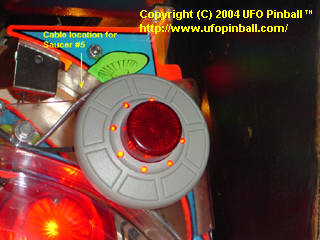
Location of cable for Saucer #5 Saucer #6 is located along the right wall of the game, about midway up the playfield. Install it so that the wire for the LEDs is located towards the playfield ... at approximately the 7 o'clock position. 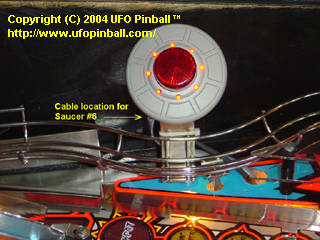
Location of cable for Saucer #6 Chapter 1: Tools and preparation Chapter 2: Mounting the board(s) and connecting power Chapter 3: Inserting LEDs in the Mini-Saucers Chapter 4: Installing the mini-saucers back in the game Chapter 5: Setting up the Hallway LEDs Chapter 6: Running wiring harnesses under the playfield Chapter 7: Connecting the Backglass GI Chapter 8: Testing and jumper settings Chapter 9: Troubleshooting |
Back to the Main Page
Copyright © 2021 UFO PinballTM
www.ufopinball.com