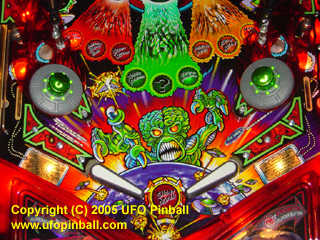
Revenge from Mars
Mini-Saucer LED KitTM
(Click to enlarge)
How to Install the RFM Mini-Saucer LED Kit
Chapter 3: Inserting the LEDs in the saucers
|
Our next job is to install the saucer LEDs. The saucer cords are in three parts. The first part is the cord with the LEDs that will fit into the saucers. This cord will run down to the metal "wall" where all the rest of the wiring harnesses connect/disconnect. The second part are telephone wire couplers that will allow you to connnect/disconnect the saucer cords just as easily. The third part is an extension "telephone" cord that connects back to the RFM-LED board. 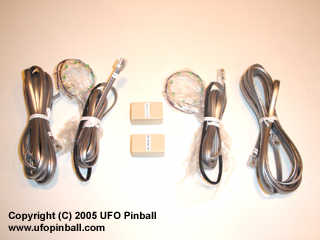
RFM Saucer Cords, Couplers and Extension Cords (Click to enlarge) Locate your two saucer cords. All three parts come pre-connected, so you will need to separate the LED cord from the coupler. Each cord set is numbered. Saucer #1 is the left saucer. Saucer #2 is the right saucer. Unmount your two saucers off the game (located above the slingshots). You will need to mount the LEDs in the existing holes that form a ring the green plastic dome. You may wish to simply grab a comfy chair and do this part away from the game. It may take a while to get all the LEDs properly seated in the saucer holes. Grab a small flat-head screwdriver out of the supplied miniature screwdriver kit, and use it to seat the individual LEDs into the saucer holes. The LEDs should fit snugly into the holes, and stay mounted without the need for any adhesives. Note that saucer condition may vary from game to game. 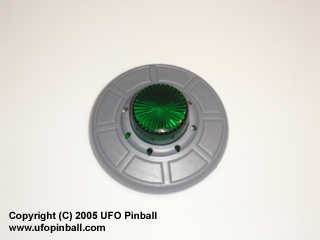
Close up of the holes in the saucer's plastics (Click to enlarge) 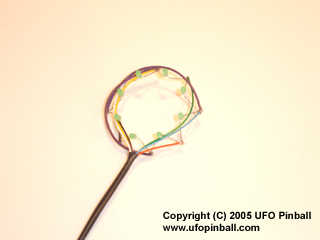
Mini-saucer LED unit (Front) (Click to enlarge) 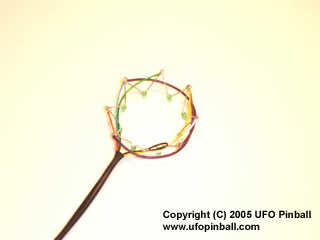
Mini-saucer LED unit (Back) (Click to enlarge) 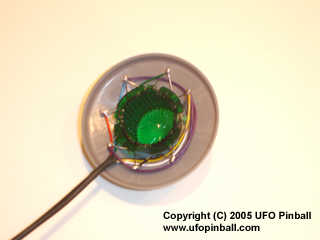
Installing the mini-saucer LED units (Click to enlarge) 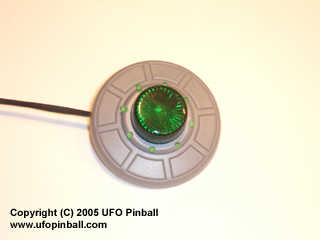
Mini-saucer with the LED unit properly installed (Click to enlarge) Once you have completed the LED installation, you can re-install the saucers into your game. Feed the phone plug end of the cords through the existing holes in the slingshot plastics, then through the existing holes in the playfield. Pull the cord nice and snug and mount the saucer with as little cord showing as possible. Route the saucer cord under the playfield and bundle it in the existing wiring harness clips. The cord should run all the way back to the metal wall where the rest of the wiring connections live. Locate the two telephone wiring couplers. They are numbered on one side, and have adhesive foam mounted to the other side. Remove the protective film from the adhesive foam, and mount the couplers on the metal wall. Once these are mounted, connect the proper numbered saucer cords to the front side, and the extension phone cords to the back side. Route the extension cords in the same fashion as the signal wiring harness. Feed the cords up the back wall of the game and up the left side of the head (right side to you, if you are behind the game). The cords should easily reach the RFM-LED board. The #1 saucer cord goes in the top plug, and the #2 saucer cord goes into the bottom plug. At this point, your installation should be complete. Power up the game. Be sure to have the coin door closed. If you have the backbox open, you should be able to see the three LEDs on the board. The left one (#1) should always be on. The middle one (#2) should always be flashing. The one on the right (#3) will remain on until the RFM boot sequence is complete. The saucers follow the "General Illumination" lights on the playfield (specifically, lamp 78B) ... so they will remain dark until the game has completed the startup procedure. Once the game comes up, LED #3 should go out. From here on out, LED #3 will only come on when the coin door is open, or when the center ramp flasher is active. While the game is in attract mode, the saucers should remain active. Go ahead and start a game. As I said before, the LEDs follow the illumination in the game. In general, the LEDs should remain bright and active. For certain modes like "Martian Happy Hour", the game dims the lighting, so the LEDs will also run a little dimmer. For modes like the "Hypno Beam", the saucer LEDs should be dark. When the illumination is strobed (ie: at the end of a given mode), the LEDs will strobe as well. Chapter 1: Installing the board Chapter 2: Connecting the wire harness Chapter 3: Inserting the LEDs in the saucers Chapter 4: Remounting the saucers back in the game Chapter 5: Connecting the saucers to the board |
Back to the Main Page
Copyright © 2005 UFO PinballTM
www.ufopinball.com